
The Email campaign feature enables you to send mass email communication to your contacts, contact groups and prospects. These emails include your branding and are beautifully formatted with HTML layouts that you control. You can create a library of messages and store them in your account for reuse in future campaigns. You will notice that you have access to some dynamic variable data like contact first name, contact email, etc while creating your campaign. What this means is that by inserting the tag for these variables, when your campaign is been processed the tags are replaced by real values for each email. This allows you to personalize your email for each user even though your message is been sent in bulk.
Creating an email campaign in Zealder.com involves four steps:
1. Select attributes - layout, group, color, and subject.
2. Develop message using the Page Editor and attach listings.
3. Create Message footer.
4. Preview and send the campaign.
Step 1.
Go to the Marketing page and click Start New Email Campaign from the left navigation bar. The following screen is displayed.
A campaign title is created in the text box, by default. You can change this text.
Select the group or individual contacts (to which you want to send the campaign) from the list box.
If you have to include any additional email addresses to your list, you can enter them in the text box.
Choose a layout/frame by selecting the radio button.
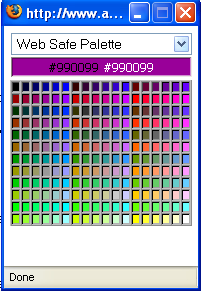
Select a background color by clicking the palette icon and choosing the color.
Enter the subject, name and From email address in the respective text boxes.
Click
Save and Continue.
Palette icon:
Step 2
Enter your content in the Page Editor.
If a message has been previously stored, it can be viewed in the Message drop down list. You can select that message and then customize it to suit your current need.
If you want to save the message, select the checkbox: Save this message in content library.
The listings are displayed in the bottom section. If you want to attach any listings to your message, select the listings checkbox and click Save and Continue.

Step 3
Create a footer for your message. By default your email campaigns will include an optout option in the footer section for your subscribers to optout of all future emails from you. Although we do not enforce how you manage your optout subscribers, it is required that you do provide an option to do so. Abusing user privacy may result in terminating your account. The easiest way to be sure your email campaign is never sent to unsubscribed users is to leave the default optout option in tact in your campaign footer. When using this option we automatically optout the email address from all future campaigns for you. To manually optout a user from your campaigns you can visit the following URL and enter the email address in the box provided:
http://yourdomain.com/?optout=optoutemail@domain.com (replace yourdomain.com with your hosted domain name and optoutemail@domain.com with the email address you want to optout)
To set the footer for your message follow the same steps as in step 2 to create the content for the footer. You can also save the footer to the content library by selecting the checkbox. Click Save and Continue to continue to the final step.

Step 4:
Here, you can preview the message and edit it. You can run a test to preview how your message will be delivered by sending a test email (recommended).
Enter the email address in the text box and click Send Test. The message is sent to the email address.
Select the checkbox: I agree to the spam policy below.
Click Launch campaign to send the message to the destination email IDs.

The campaigns are displayed in a list and can be viewed in the campaign summary page.

NOTE: IT IS VERY IMPORTANT THAT YOU ABIDE BY OUR SPAM POLICY. Misuse of this service may lead to termination of your account and even legal actions if necessary. Any email address that you did not receive permission to send messages to directly from the email address owner is considered SPAM.
NOTE: Although you can setup Email Campaigns during the Free Trial and even send test messages to your self, your actual email campaign will not be sent until your account is active.