 button on
the toolbar. A Popup window called "Image Properties" will appear.
It includes four bookmarks:
button on
the toolbar. A Popup window called "Image Properties" will appear.
It includes four bookmarks:Inserting Images
in page editor is very simple. Just press the button on
the toolbar. A Popup window called "Image Properties" will appear.
It includes four bookmarks:
Contents
Image Info
Link
Upload
Advanced
Image Info
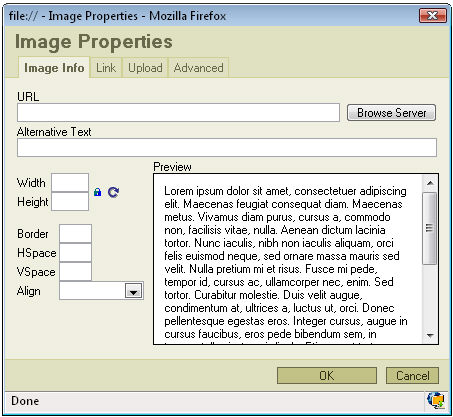
The first bookmark refers to the "Image Info"
URL: defines the URL address of the image. You may also use the "Browse Sever" in order to browse the files.
Alternative Text: puts the descriptions of the image if you want it to be different than the image name.
Width: specifies image width.
Height: specifies image height.
You may lock the image proportions by pressing or you can return to the original image size by pressing .
Border: specifies the size of the border you want to place around the image.
HSpace: defines the size of the horizontal gap.
VSpace: defines the size of the vertical gap.
Align: specifies the alignment of the image. You can choose from: Left, Abs Bottom, Abs Middle, Baseline, Bottom, Middle, Right, Text Top or Top.
Pressing "OK" inserts the image with the specified properties.
Link
The second bookmarks regards to "Link":
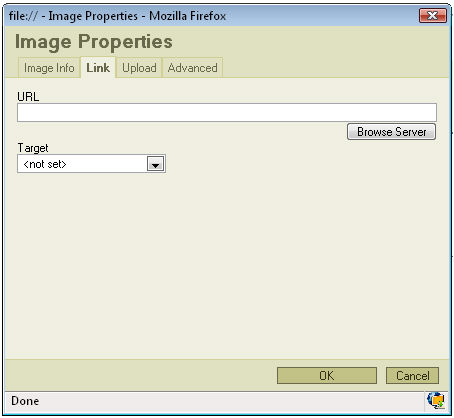
URL: defines the URL address the image will link to. You may also use the "Browse Sever" in order to locate a file to link to.
Target: defines the target of the link (for advanced users). You can choose from New Window ( _blank ), Topmost Window ( _top ), Same Window ( _self ) or Parent Window ( _parent ).
Upload
The third bookmark is the "Upload" section:
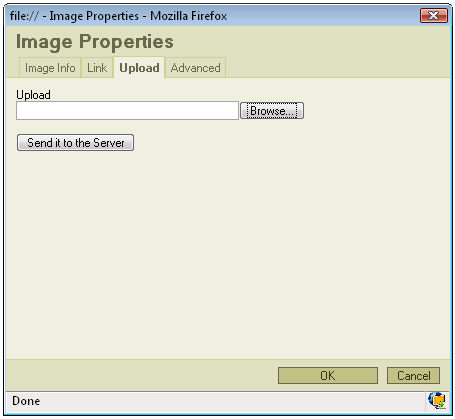
Upload: specifies the location of the image file on your local hard drive. You may also use "browse" if you don't want to type the location manually.
Pressing "Send it to the Server" sends the image to the server.
Advanced
This bookmark is only for advanced users:
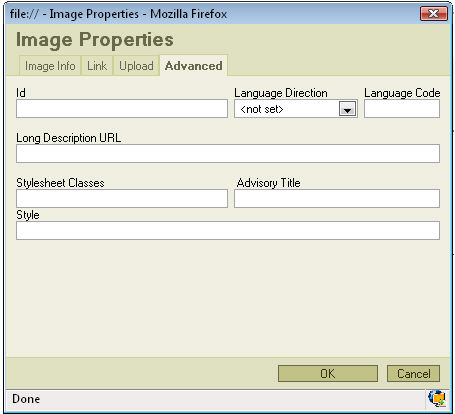
Id: specifies the ID of the image.
Language Direction: sets the language direction from left to right ( LTR ) or from right to left ( RTL ).
Language Code: specifies the language code e.g. en, pt, pl.
Long Description URL: specifies the description of the page.
Stylesheet Classes: specifies the name of the CSS class.
Advisory Title: specifies the description of the target object.
Style: specifies the style.