You can create an agent roster on your website. Adding agents is a two step process. You must enter the general information, access details and contact information in the first page. In the second page, you can upload the agent's photo and add their profile. After adding an agent to the roster the agent themselves can login to their account and add/edit their photo and profile. Agents can perform many other functions such as manage their listings, prospects or even manage your website design if you grant them permission to do so.
To Add Users/Agents:
Go to the "Manage Office" section
Click Add Users/Agents from the left navigation panel.
Add User/Agent step 1 of 2 Screen appears.
Enter the required information in the forms.
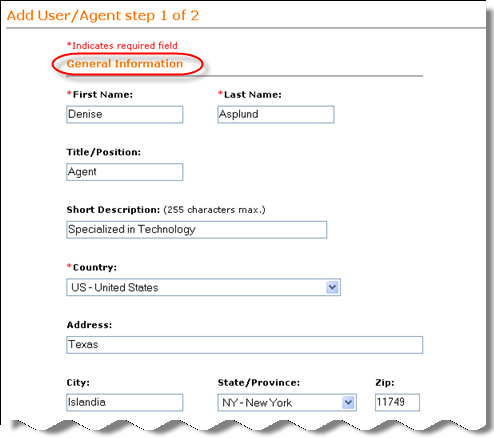
General Information:
Enter the following details in the respective text boxes:
First name, Last name (both mandatory), Title, Position, a short description of the agent.
Select Country from the drop down box. Enter the address, city information and Zip code details in the text boxes.
Select State/Province from the drop down list.
Access Information:
You can grant two types of site privileges to your agents. You can either provide access to the complete Admin Control Panel or you can choose to provide access only to certain basic features such as working with Listings, Design and Contacts.
Enter Email and password information in the text boxes.
NOTE: you can not enter an agent email address that is the same as your account email address or any other agent email address. If the agent's email address is the same as the account owner email address you must either change the email address on your account or use a different email address for the agent.
Select Privileges by clicking the appropriate radio button. For basic features, select the radio button and then select the appropriate check boxes.

Contact Information:
Enter Agents website URL as shown in the image. Enter the details of Phone, Fax, Mobile phone, Pager in the respective text boxes.

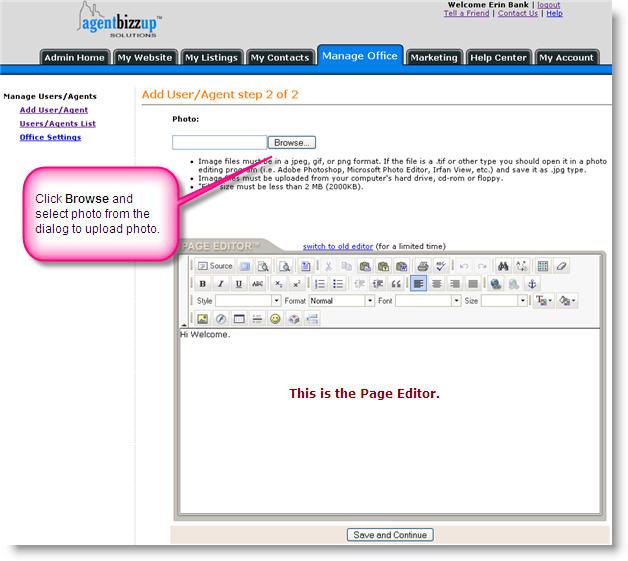
Add User/Agent step 2 of 2 Screen appears.
Here, you can add a photo and enter the profile of the agent using the Page Editor.
To upload the photo from your desk top to the Zealder.com server location, click Browse and select the photo from the dialog box.
Enter the profile in the Page Editor workspace.
Click Save and Continue.
NOTE:
* Image files must be in a jpeg, gif, or png format. If the file is a .tif or other type you should open it in a photo editing program (i.e. Adobe Photoshop, Microsoft Photo Editor, Irfan View, etc.) and save it as .jpg type.
* Image files must be uploaded from your computer's hard drive, cd-rom or floppy.
* "File" size must be less than 2 MB (2000KB).
Your user profile is updated and a message is displayed.
This user is now listed in the User/Agents list page.
